1. Select from the side menu: Routes → add route. (Fig. 1.). Side panel should open.
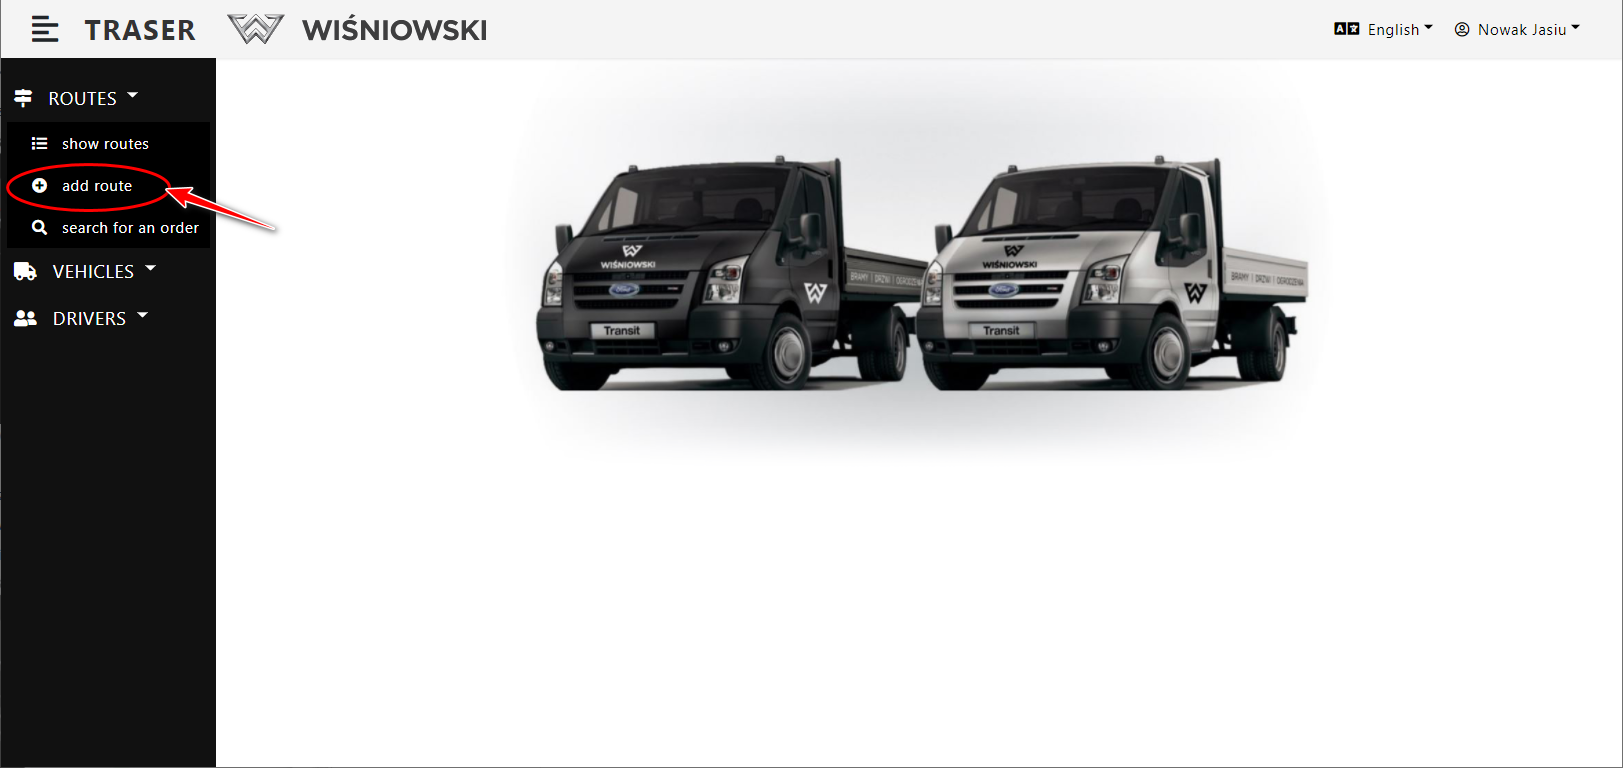
Fig. 1. Choosing an option from the menu.
2. Fill in all the required data on the side panel and click "Save".
Please pay attention to the field "Type of goods to be loaded" underlined in red oval. It determines the channels in which the given type of goods is loaded.
If we change the type of loading to e.g. a net (Fig. 3), the available loading times and the channel to which the driver should drive for loading will also change.
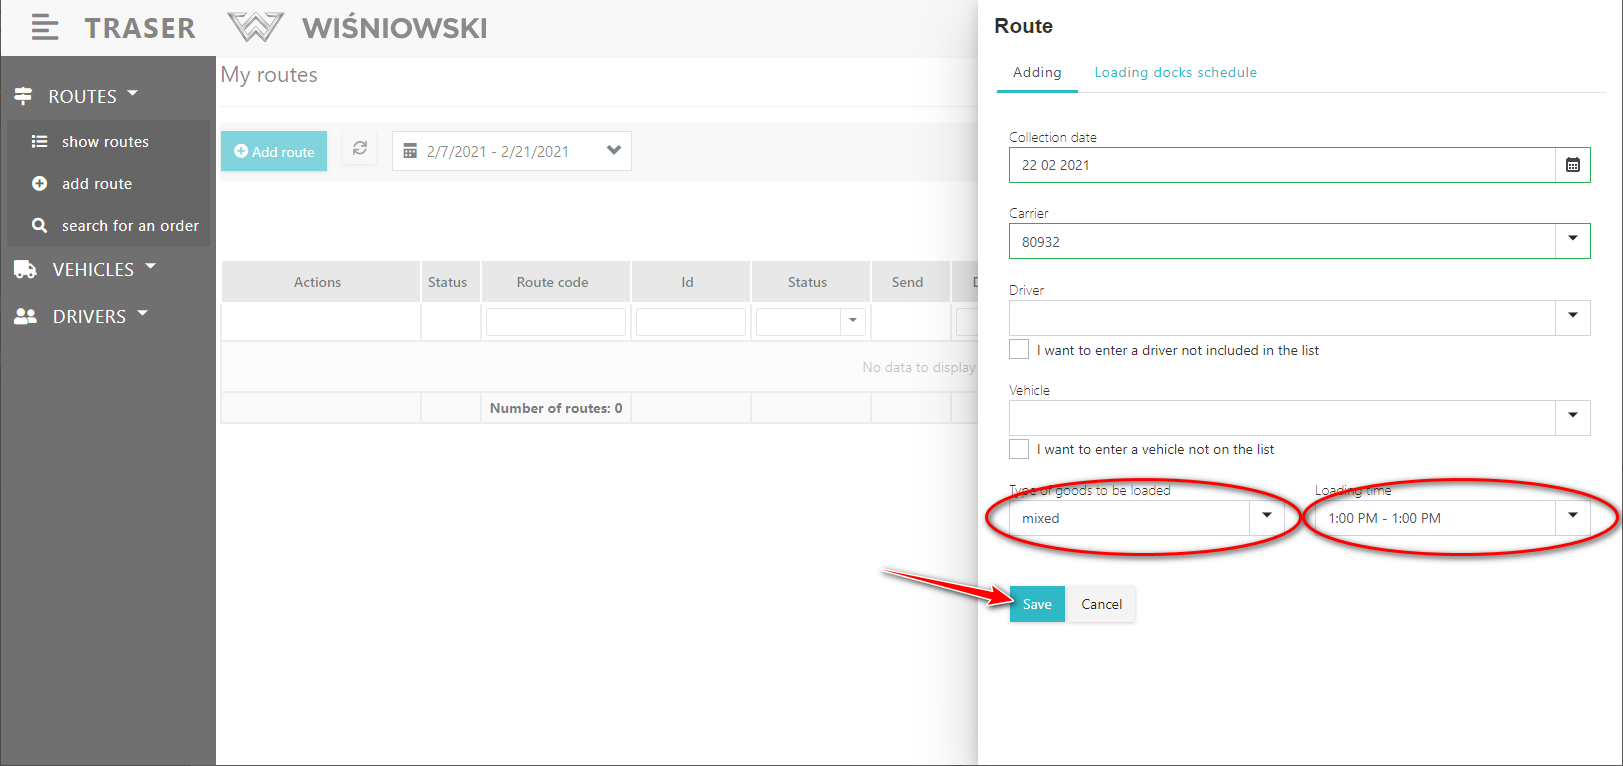
Fig. 2. Completing the Route header.
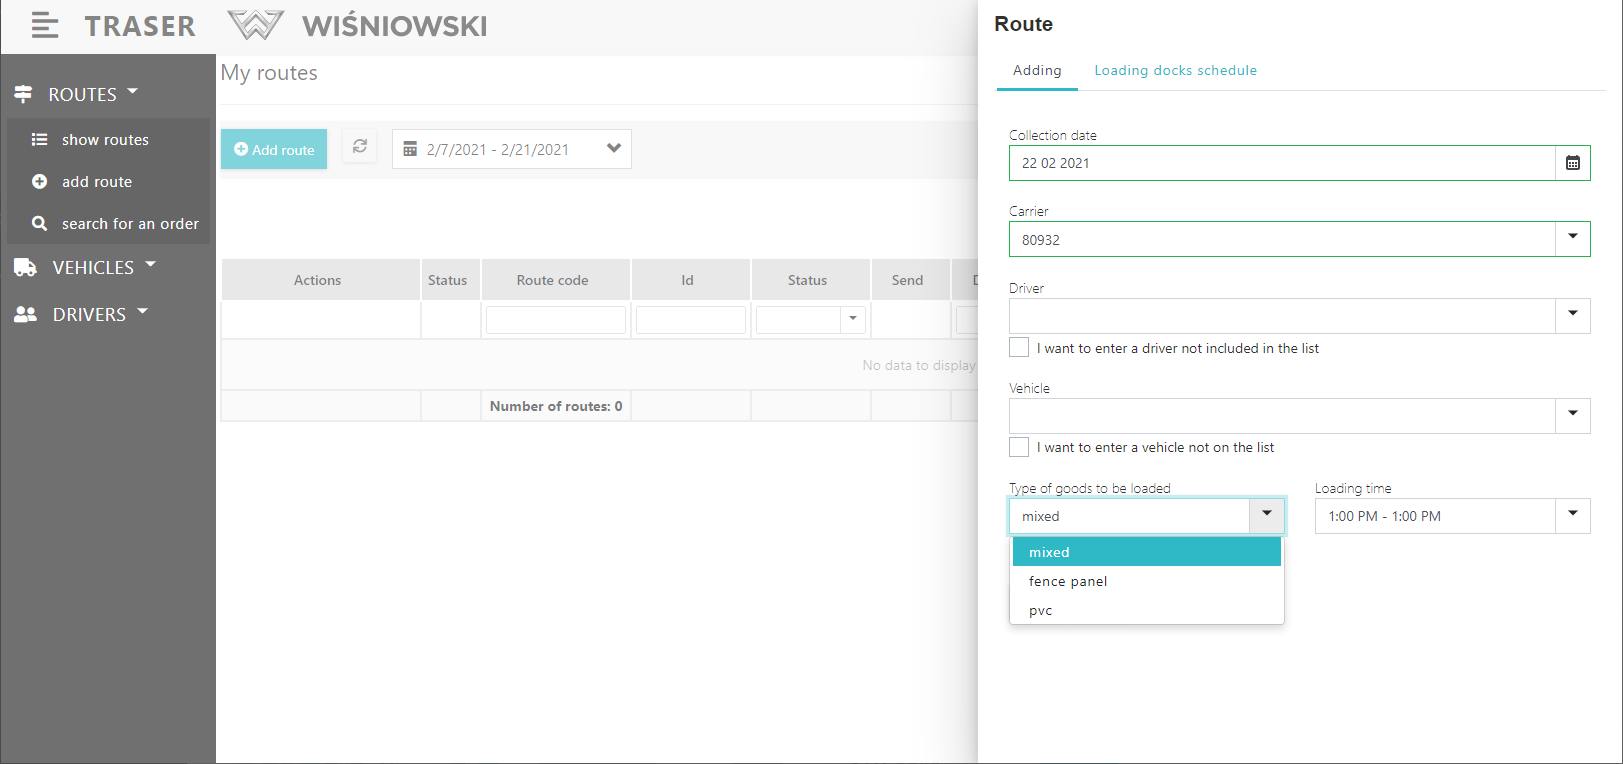
Rys. 3. Completing the Route header.
3. Please select at least one Item from the list by selecting it in the first column. Then click "Add Selected".
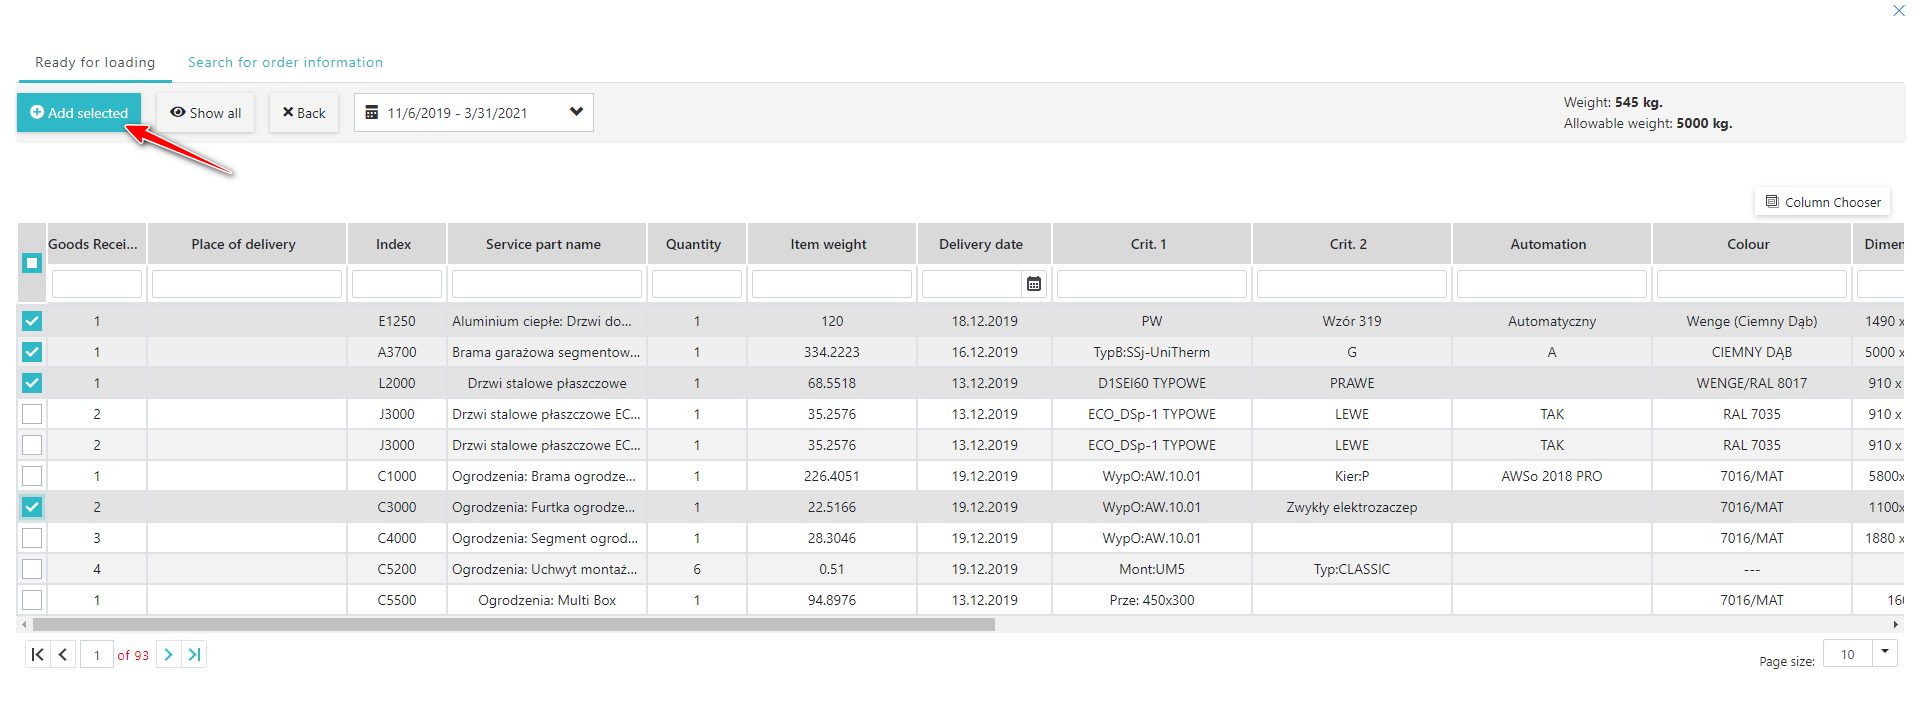
Fig. 4. Adding an Item to the Route.
4. If the Route has been created correctly, you will be redirected to its detailed view and a green box will appear informing you that the route has been created (Fig. 5.).
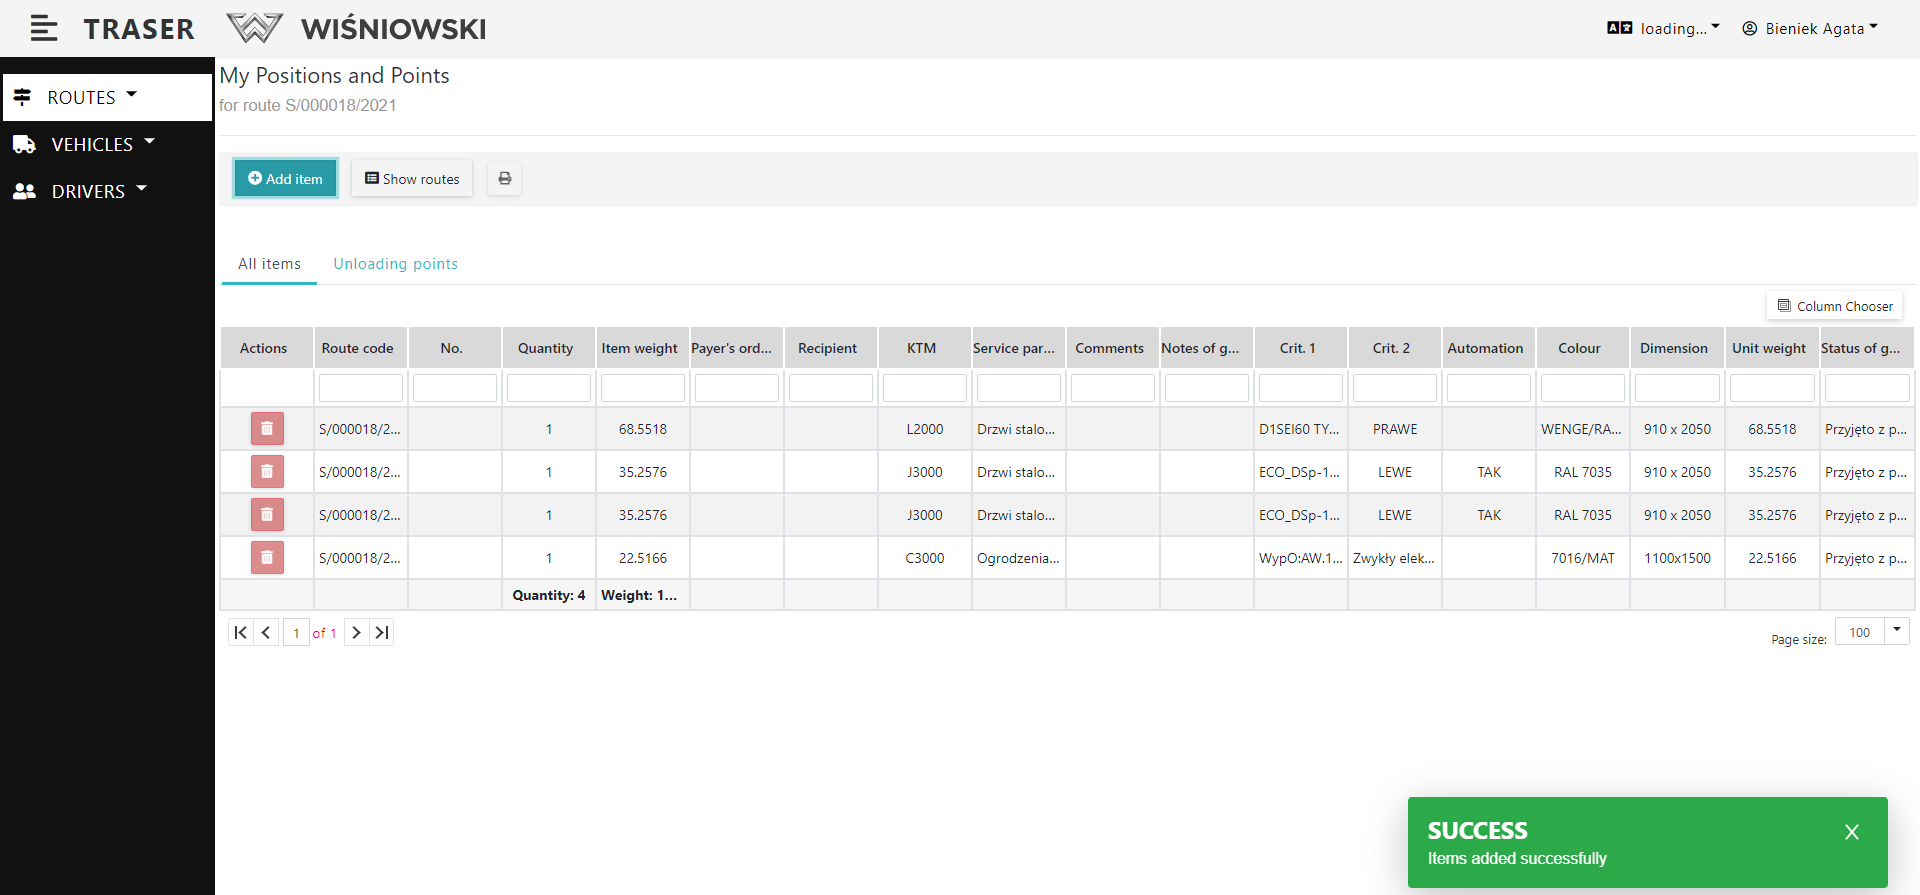
Fig. 5. Routs list.
ANOTHER WAY TO ADD A ROUTE
1. Select in the side menu: Routes → show routes. A list of Routes should be displayed. Click the "Add route" button (Fig. 6.). Then proceed as in Fig. 2. and Fig. 4.
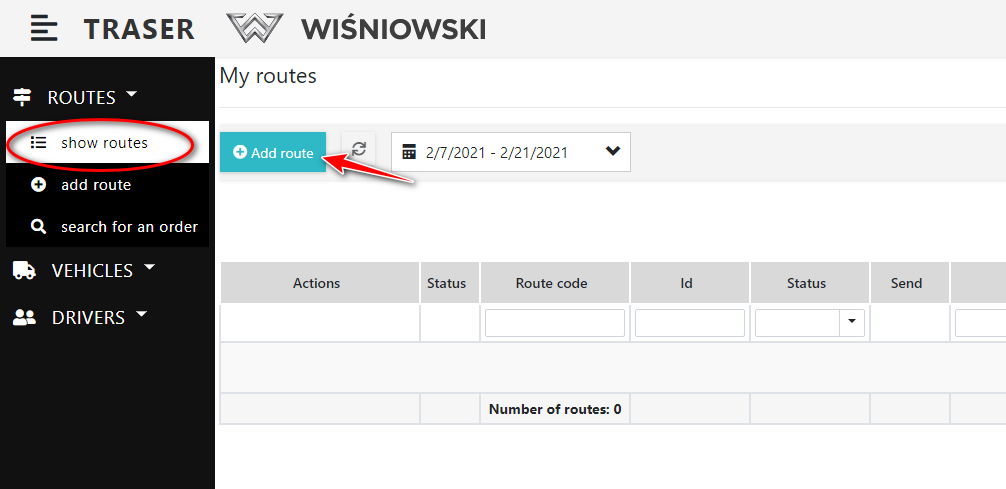
Fig. 6. Adding a Route from the Routes List view.